Personnel Seniority
The seniority entered in personnel profiles can be utilized for multiple purposes within your site. The following sections will cover some options you have for incorporating seniority into job availability.
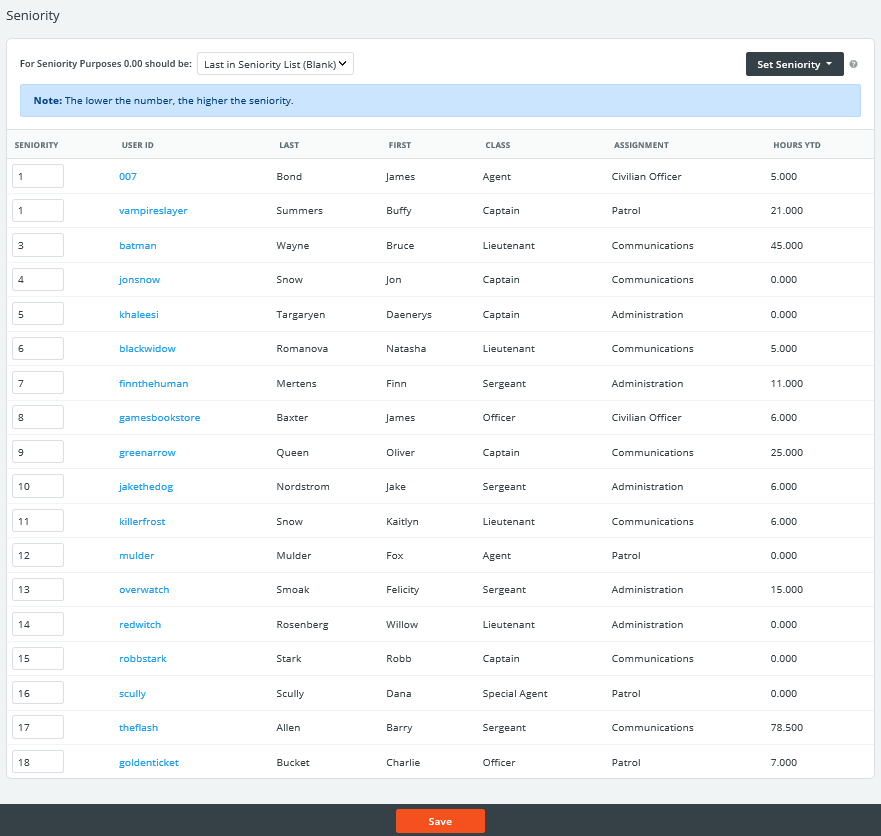
Administrators can view an overall list of personnel seniority levels by hovering over Personnel on the top menu bar, then clicking Seniority.

The lower the number, the higher the employee’s seniority level. If more than one employee possesses the same seniority number, those employees are considered to be within the same seniority "group".
Change any of your seniority preferences here and click Save.
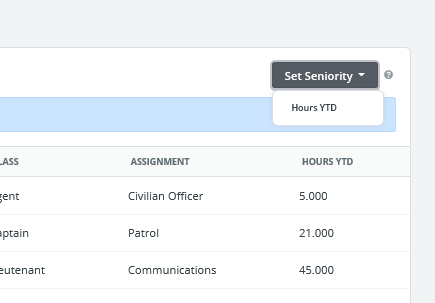
If you have created any custom data columns in your site settings, they will appear as the right-most column(s) in your list and you will be able to assign seniority based on this data. Choosing to set seniority to data like year-to-date hours allows you to use seniority as an ordered list when using job sets (see Creating a Bidding Order by Seniority below).
Simply click the drop-down menu called Set Seniority to select one of your pre-built columns and click Save.

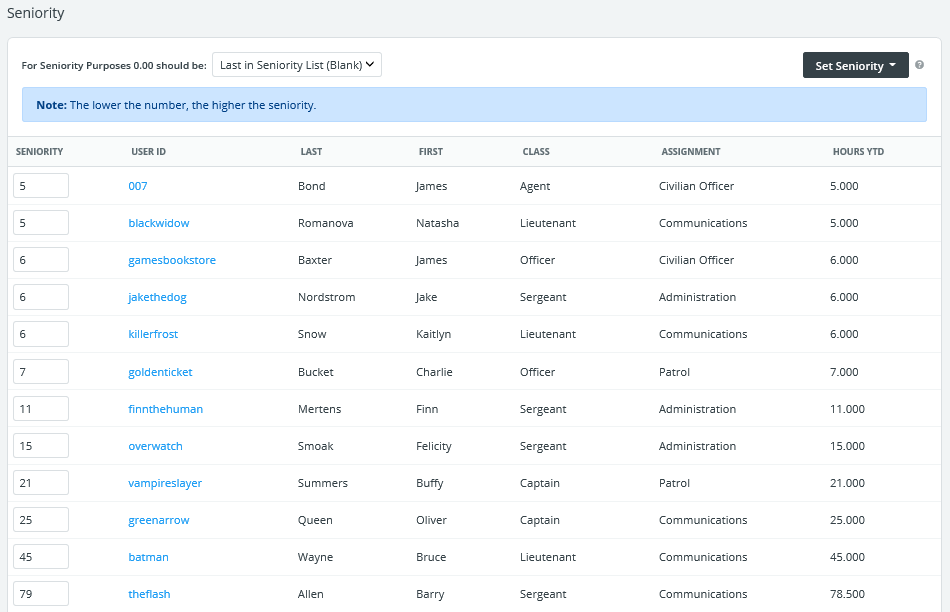
Your seniority will now be reordered according to the numbers recorded in your custom column. Note that since seniority can only be entered as a whole number, any decimal values in your custom columns will be rounded up.

You can choose at any time to set the seniority to updated numbers within custom columns, or entering the number manually.
Approving Job Applications by Seniority
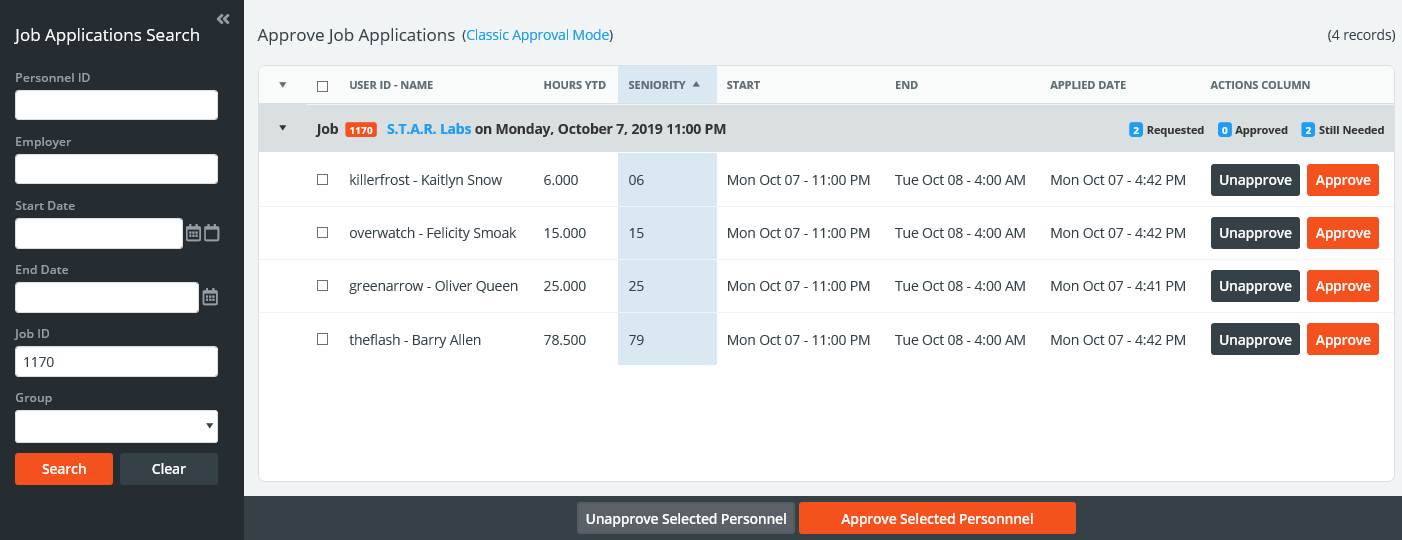
If your site is configured to review all job applications (manual approval), the application approval page will show a list of interested personnel along with their seniority. This column and any other custom columns created can be sorted to review the data and select who is best suited to work a job. See Approving Job Applications for more information.

Creating a Bidding Order by Seniority
PowerDetails has two tools that can be used to open up jobs for personnel based on seniority. The first is a fairness tool called Job Sets, and the other is an automated site configuration called Queue Seniority Minutes.
Job Sets by Seniority
Job Sets allow administrators to specify a date and time that a range of jobs will become available for personnel to apply. Using the Bid Type "Seniority" allows you to generate an ordered list, giving personnel with the lowest seniority number to start applying to jobs first. After a period of time that you indicate, the second person is allowed to begin applying, and so forth.
For example, imagine a line of people queued outside of a store. Each person is assigned a number from lowest to highest and are lined up in this manner. At a certain date/time (your Bid Start Time) the person with a number 1 or the lowest number is allowed into the store to begin selecting their jobs. After X amount of time (you specify), the person with a number 2 or the second lowest number is also permitted to enter the store and begin picking jobs. After a period of time (when your Bid End Time is reached) everyone has successfully entered the store and are "shopping" for jobs.
Here, we can see that seniority is used as a "bidding order". For example, if you would like to permit a group of people rather than individuals to start picking jobs first, set them all to a seniority level of 1, then the next group at 2, and so on.
If you would like to establish an order within these groups, you can do so by entering numbers like 101, 102, 103 for the first group and then 201, 202, 203 for the second group, etc.
See Job Sets for more information.
Queue Seniority Minutes
Administrators can choose to automatically open jobs on a daily basis, queued by seniority. Entering a number in the Queue Seniority Minutes configuration will give sign-up access to jobs opening within your Max Application Time Frame by order of seniority every number of minutes specified.
For example, let's imagine that you posted a job for January 30th, 2020 at 12:00 PM. If Max Application Time Frame is 30 days and Queue Seniority Minutes is 60, employees with the highest seniority level will be permitted to sign up first at 12:00 PM on January 1st (exactly 30 days before the job happens), with the second-highest level at 1:00 PM, then the next level at 2:00 PM, etc.
If you do not want to make jobs available on a rolling time frame by seniority, set this number to 0 or use the Job Sets by seniority feature instead.