Managing Payments as an Administrator
When employers send payment for an invoice or estimate, this can be recorded on multiple estimates/invoices at once (when applicable), a single estimate/invoice form, or by marking them as "paid" without having to enter specific details. The latter may be preferable if you are recording payment details in another system.
Note: Sites that are configured to pay Personnel through Direct Deposit cannot receive electronic (credit card or ACH) payments on estimates
Entering Payments for a Single Estimate or Invoice (Administrators)
There are two areas in which an administrator or personnel administrator with access to the billing module can enter payments.
- Hover over Billing on the top menu bar and click Estimate Search or Invoice Search to locate the appropriate estimate/invoice using desired filters on the left search panel. Click on the ID to open the form and scroll down to the Payments section.

Click Receive Payment to enter the payment details for an individual estimate or invoice. Read more below on how to enter specific types of payments. - Administrators can also view ALL accounts receivable, by hovering over Billing and click Receive Payment. Here, you can press the Select link next to an individual invoice. This will bring you through the same process as outlined above.

Read how to receive a payment over multiple invoices below.
Sites paying personnel through direct deposit will display a payment calculator containing all line items. Check the box of the line items to be paid for, and the Payment Amount field will update automatically.
Employees that have not registered their bank account for direct deposit or whose job has not yet been reviewed by an administrator cannot be paid on this screen. Check or cash payments must instead be recorded.
When paying via either electronic or non-electronic methods, line items that cannot be paid will display either a yellow warning icon ![]() or an exclamation icon
or an exclamation icon ![]() to indicate this. Hover over the icon to view the explanation.
to indicate this. Hover over the icon to view the explanation.
Entering a manual payment
Manual payments, such as a check or cash received, can be recorded in PowerDetails as a standard feature on estimates and invoices. When entering a manual payment, use the Payment From drop down menu to define the method of payment. Record the check number if applicable and enter a comment (optional).

Click Next to review the payment entry and press Save or Make Changes if needed. The record will then appear on the estimate/invoice's Payments section.

Entering a Credit Card Payment
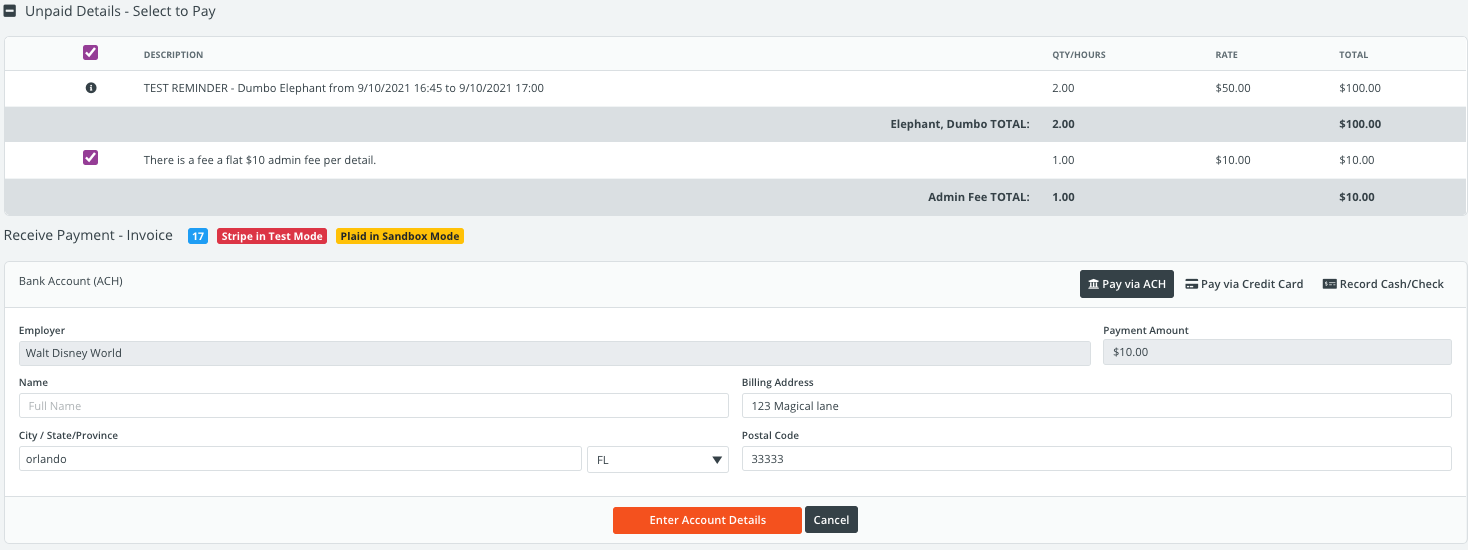
If your site has PowerDetails Pay enabled, you will see options to pay via ACH, credit card, or enter a Cash/Check payment for an invoice when selecting a payment option. PowerDetails Pay is powered by Stripe.
Enter the credit or debt card information along with the payment amount. The amount will default to the balance on the estimate/invoice, but can be changed for partial payments. Click Pay to review and confirm the payment.

Note that every credit card payment incurs a processing fee as indicated in your site's PowerDetails Pay settings.
If the employer is responsible for the processing fee, it will be added on the invoice when confirming the final payment amount (see image below). If your agency is responsible for the processing fee instead, it will simply be deducted from the deposit and will not be shown to the employer.

A printable payment receipt will appear for your records. Additionally, a PowerDetails message and alert (if enabled) will also be sent to administrators and an email will be sent to the billing email address of the associated employer.
![]()
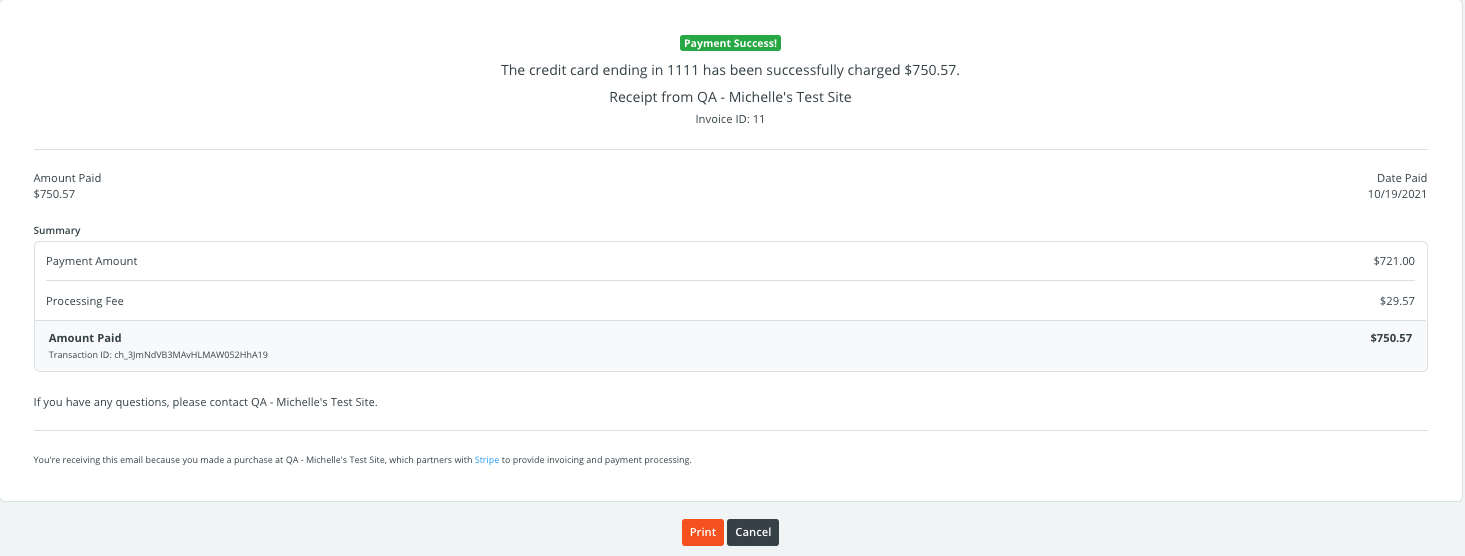
The completed transaction will show within the estimate/invoice's Payments section along with the Transaction ID. This can be used to reference any payout questions within the PowerDetails Pay Transaction tab, or when contacting the PowerDetails support team.

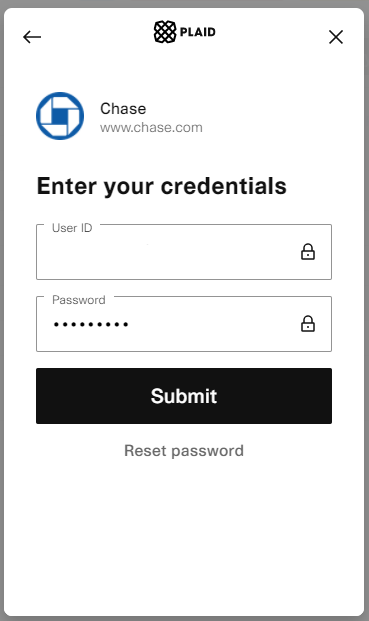
Entering ACH (Bank Account) Payments
If your site has PowerDetails Pay enabled, your Employer's may see an option to enter bank account information when clicking to Receive Payment on the invoice.

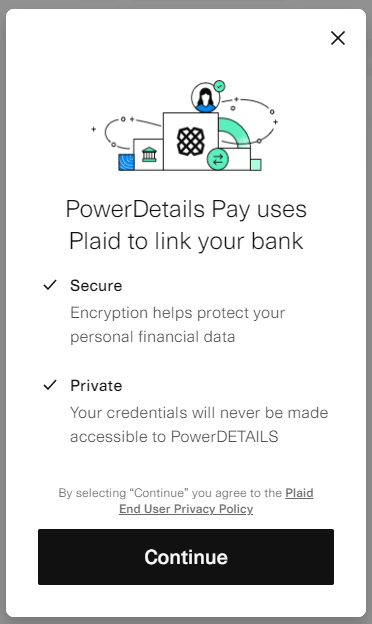
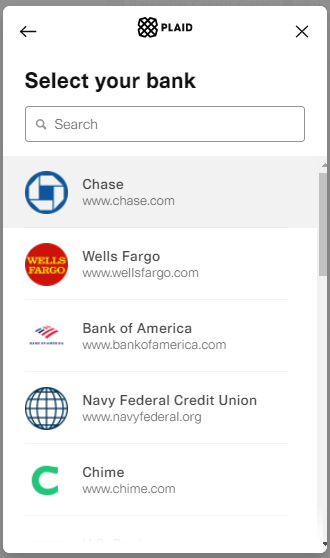
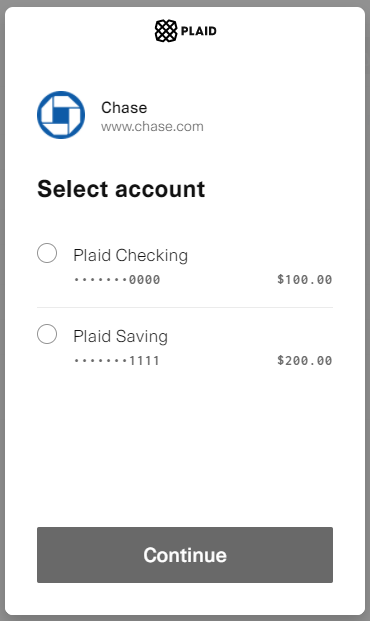
PowerDetails Pay uses Plaid to link to the payee's bank account. Click to Continue and enter the credentials after selecting your bank. Once connected, you will be able to select an account to pay from.
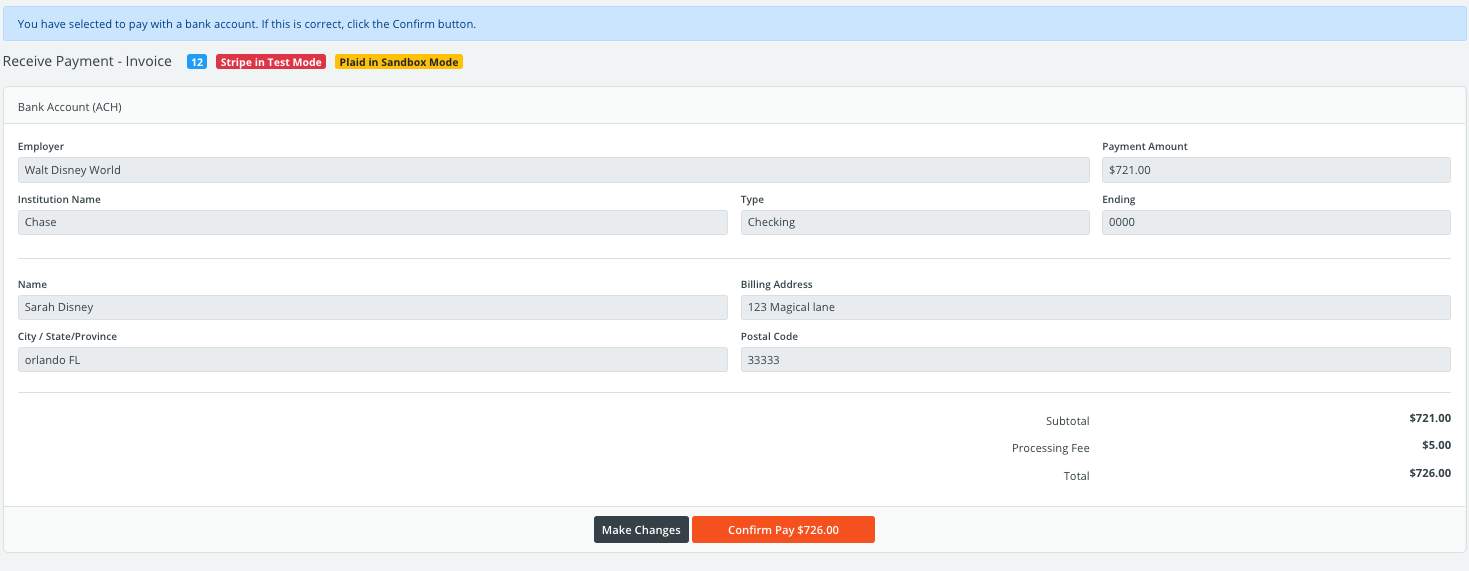
Note that every ACH payment incurs a processing fee as indicated in your site's PowerDetails Pay settings.
If the employer is responsible for the processing fee, it will be added on when confirming the final payment amount (see image below). If your agency is responsible for the processing fee instead, it will simply be deducted from the deposit and will not be shown to the employer.
A printable payment receipt will appear for your records. Additionally, a PowerDetails message and alert (if enabled) will also be sent to administrators and an email will be sent to the billing email address of the associated employer.
The completed transaction will show within the estimate/invoice's Payments section along with the Transaction ID. This can be used to reference any payout questions within the PowerDetails Pay Transaction tab, or when contacting the PowerDetails support team.

Payments are reflected in the employer's bank statement 1-2 days after the charge succeeds.
Entering Payment over Multiple Invoices
The Receive Payments page (under the Billing menu) lists all outstanding invoices (unpaid or partially paid), and allows Administrators to perform all payment operations.
- Receive Payment on a single invoice by pressing the Select link next to an invoice. See the above section on Entering Payments for a Single Invoice.
- Mark one or more invoices as "Paid" without having to record specific payment information like a check number.
- Apply a single payment over multiple invoices.
To simply mark one or more invoices as "Paid", check the boxes of the desired invoices and press the Mark Selected Invoices as Paid button at the bottom of the screen. The filters on the left panel may be used to narrow your search.

To apply payment over multiple invoices, click to expand the top section that reads Apply Payment to Multiple Invoices.
Note: This section is not available when paying Personnel through Direct Deposit.

As shown above, you will be able to select a single employer to apply payment over a selection of their outstanding invoices. Enter the payment details at the top of the page. Then select the invoices in which to apply to payment to and press the button to Submit Multiple Payments.
Note that payment gets applied starting at the first invoice selected at the top of the grid, then moves to the next selected invoice until the full amount has been applied to the selected invoices. The payment amount cannot exceed the total amount due on the selected invoices.
After confirming the amount and confirming the payment applies, the paid invoices will disappear from the screen. You are able to view the payment from the estimate/invoice form's Payment section.