Billing and Invoicing
The billing module in PowerDetails is flexible for many different types of accounting processes. Confirm your specific process with your site administrator.
Estimates
If your agency has opted to utilize the estimates feature and has given you permission to do so, estimates can be sent to employers before a job happens to receive payment in advance. An invoice with that same ID will eventually be created to settle any balances or over-payments.
To create a new estimate, navigate to Billing > Estimate Search and click New Estimate at the bottom of the page. You will be able to filter through a list of upcoming jobs for the employer you choose within the left search panel. Check the boxes of the jobs you would like to add to the estimate and click the Add to Estimate button at the bottom of the screen.

You will be brought to the newly created estimate form.

The newly created estimate can then be sent from the top right corner of the screen using the ![]() or
or ![]() icons.
icons.
See Payments for information on receiving pre-payments on an estimate.
Modifying Estimates
If you need to make modifications to the estimate, you may do so anytime before the first job is worked. The following actions can be taken:
- Add or Remove Jobs by clicking the corresponding buttons
- Edit assigned personnel or fees to modify the scheduled times or rates (note that this will also update the record on the job itself)
- Modify unassigned personnel or fees on the form itself by adjusting the quantities or rates. These are defaulted to the basic information on the job, but can be adjusted if different rates or quantities would be assigned to someone in that position.
Note: Removing an unassigned position will adjust the Personnel Requested on that job.

Managing the Resulting Invoice
Once the first job happens and the hours are reported, the estimate will become an invoice with the same ID. Any prepayments will be carried over to the resulting invoice.
If there is a balance, you will be able to resend the invoice and receive the additional payment as normal. See Managing Payments for more information on this and how to handle overpayments.
Invoices
After employees report their hours, you will need to invoice the employer so they can send payment. To access invoices generated in PowerDetails, hover over Billing on the top menu bar and click Invoice Search.
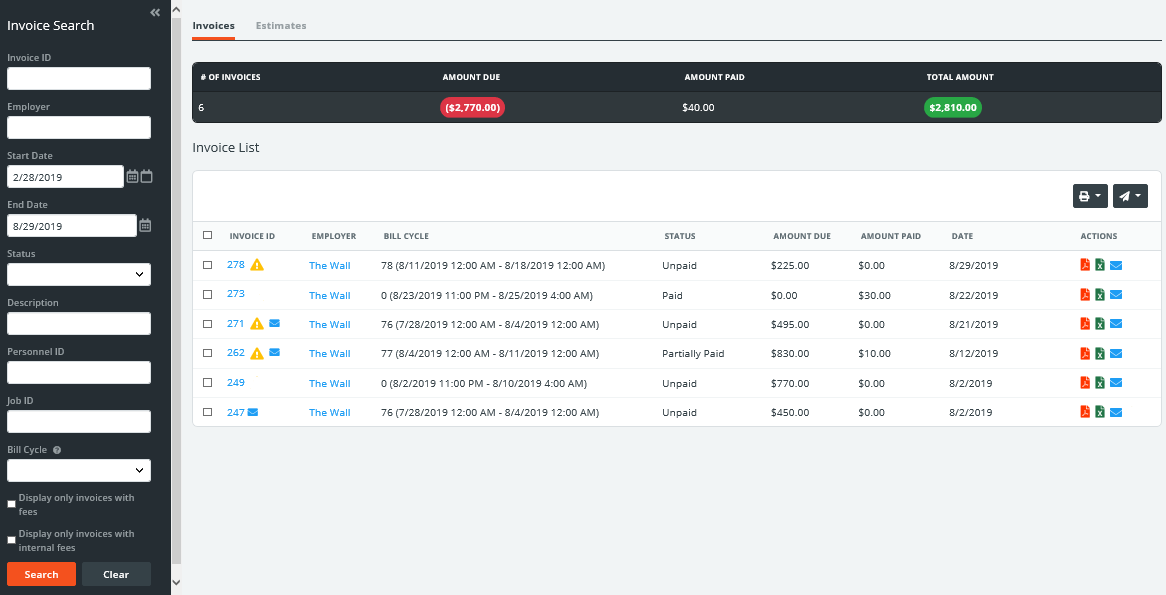
The Invoice Totals section lists the number of invoices in the system, the total amount of money due and that has been paid. The Invoice List section lists each individual invoice that has been generated. Listed are the invoice ID and Bill Cycle ID along with other information like invoice status and amount due.
Options to print, export, or send multiple invoices are presented on the top right of the list. Click any of these buttons to see available options or click one of the corresponding icons in the Actions column for an individual invoice.

If your site has been configured to require administrator approval of reported hours, you will see a warning icon ![]() next to any invoice that contains
details still in review, and next to said details within the invoice. It is best not to send these until all reported hours have been approved and the icon is no longer displayed.
next to any invoice that contains
details still in review, and next to said details within the invoice. It is best not to send these until all reported hours have been approved and the icon is no longer displayed.
Reviewing Invoice Details
To view the invoice details, click on the Invoice ID to open the form.

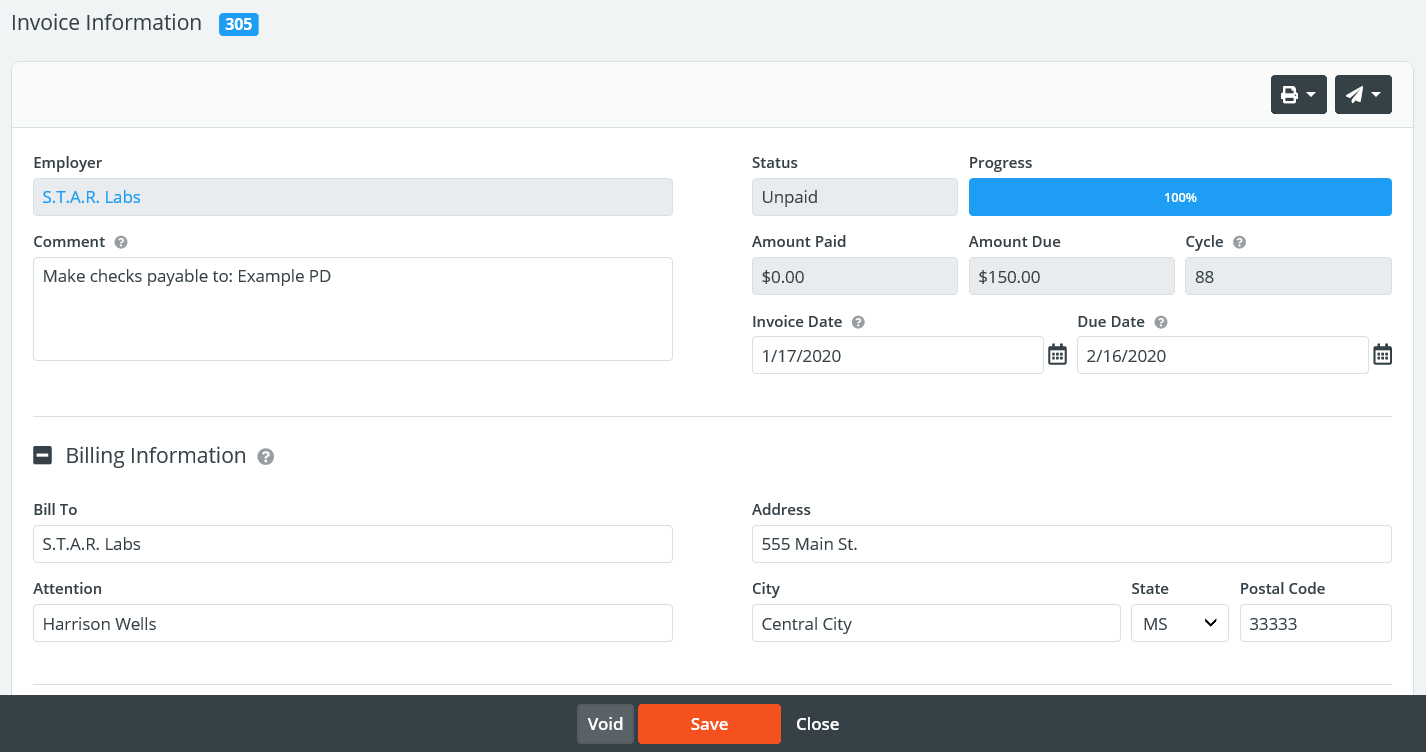
Below are explanations of each section followed by a screenshot of the invoice detail form:
| Section | Description |
| Top Section | Displays the employer information, the invoice status, amount and balance, the corresponding billing cycle, and default comment. The Invoice Date, Due Date and Comment sections can be modified. |
| Billing Information | Information entered on the employer profile’s Billing tab or unique billing information entered on a job. All of these fields can be modified. |
| Details | Contains the line items of all the reported details and fees. If your site is using the Billing Approval feature, details with a warning icon |
| Payments | Display any payments entered for this invoice. |
| Invoice History | Displays the invoice activity including when it was created, modified, or sent. |
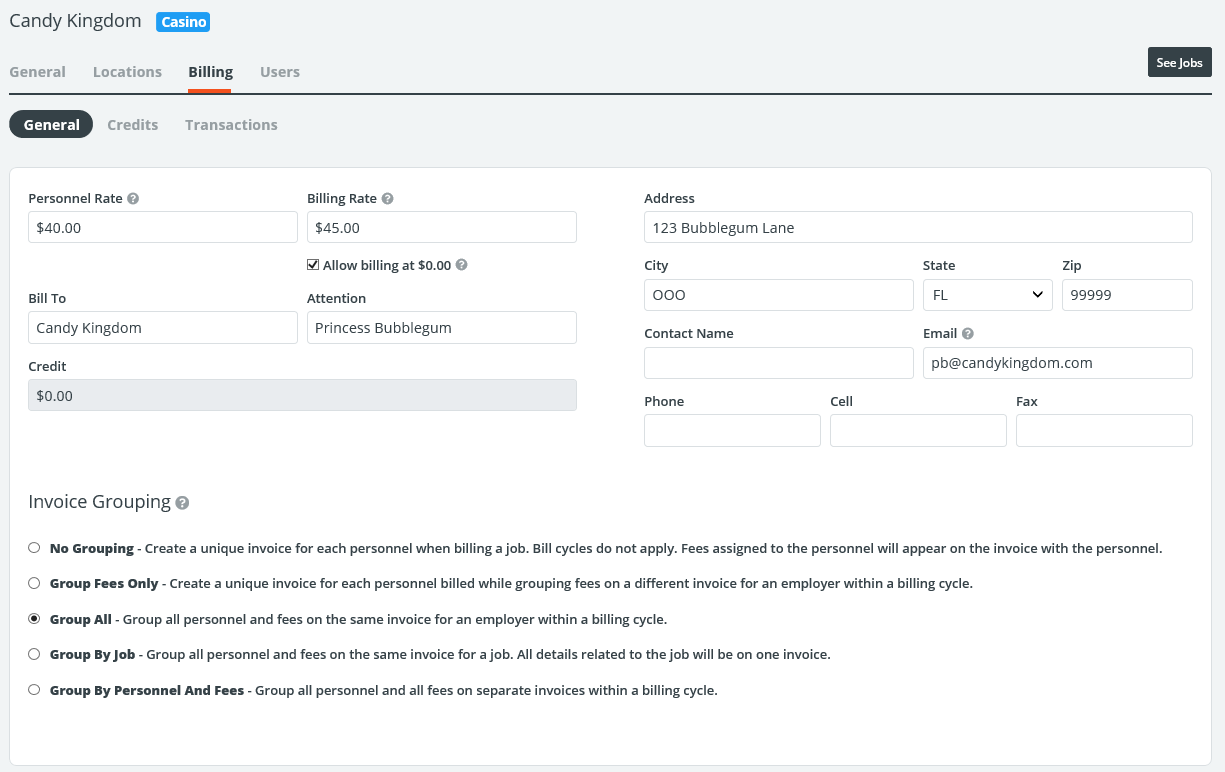
Many invoices will be listed individually by job or personnel; others will contain data for multiple jobs. This will all depend on how you choose to group invoices within each Employer profile (as shown below), and on your billing cycle within Site Configurations.

Correcting Billing Mistakes
If you find that an employee reported hours incorrectly or any changes need to be made to their job details:
- Go to Billing > Invoice Search and open the invoice ID where the person is located (use the filters on the left panels to find it).
- Click Reject next to that person’s name on the invoice form to place them back in the Bill Pending status
- They can then re-report the hours. You may also edit any job details for that person while they are in this status.
A Note About Fees
In order for fees to be reported, they must “travel” with a person. If you need a fee to be reported again with different information, you must do the following:
- Reject the person associated with the fee or all people on that job if it is a job-based fee. This will also reject the fees
- Go to the job and make any changes needed
- Ask the employee to report the hours again or report them on the employee’s behalf under Billing > Bill Completed Jobs
Adding Invoice Fees
To add an invoice-wide fee, click the button to Attach Fee above an invoice or estimate's details.


If there is an existing invoice fee template, this can be selected in the Fee drop down menu. Otherwise, you will be able to create a custom fee.
Enter a quantity, rate, description, and a comment if desired. After pressing Save, the fee will appear within the Details section on the invoice and adjust the total accordingly.

Invoice fees can be modified or removed at any time by clicking Edit next to the listing.
Sending Estimates and Invoices
Once you have determined that an estimate or invoice is ready to be sent to the employer, you can choose to send it electronically or simply mark it as "sent". Only estimates/invoices that have been sent/marked as "sent" can be viewed by any employer users. To indicate where invoices should be sent, enter the email address under the Billing tab within that employer’s profile.
On the main Estimate or Invoice Search page, click the envelope icon ![]() next to invoices to send them individually, or check the boxes next
to multiple invoices to send them all at once. Clicking the Send icon
next to invoices to send them individually, or check the boxes next
to multiple invoices to send them all at once. Clicking the Send icon ![]() on the top right of the grid will allow you to choose whether to email
these or simply mark them as "sent". This can also be done on the form itself.
on the top right of the grid will allow you to choose whether to email
these or simply mark them as "sent". This can also be done on the form itself.
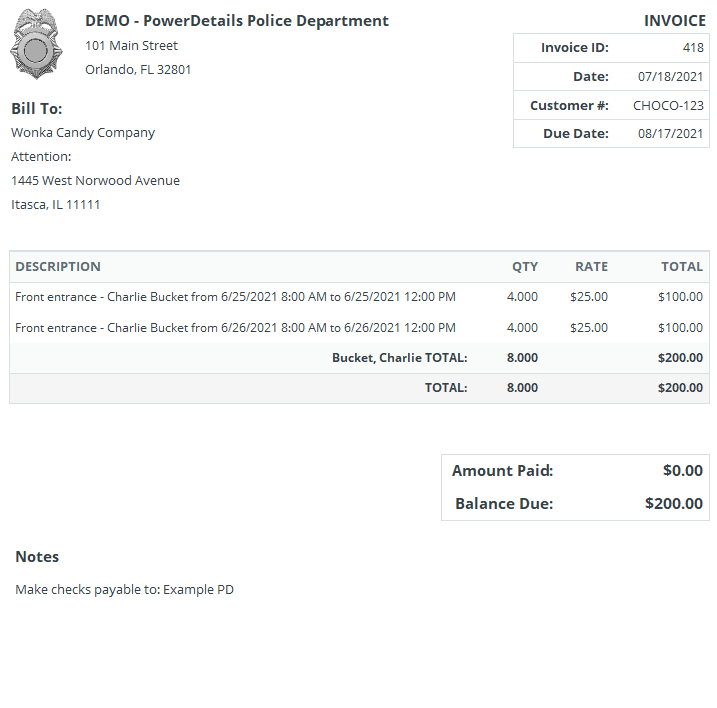
Clicking the print icon ![]() on the top right of the estimate/invoice form will allow you to preview the printed version of the invoice that will be sent
to employers. It may be printed from this page as well by clicking the export icon
on the top right of the estimate/invoice form will allow you to preview the printed version of the invoice that will be sent
to employers. It may be printed from this page as well by clicking the export icon ![]() at the top of the page.
at the top of the page.
![]()